I have played with Dapr on Kubernetes (AKS to be specific) before and loved it for its ability to simplify distributed applications development with out of the box binding, service to service communications, secret abstractions, actors and observabilities. I have previously worked with LinkerD and Istio as service mesh and ran workload in production, but I have to say, I started liking Dapr more.
Up until now, I realized that I didn’t quite manage time to run things on Azure Container Apps – which is rather new kid on the block, that provides a container PaaS, an abstraction on Kubernetes, where we can focus more on containers instead of developing and maintaining the underlying Kubernetes infrastructure.
This week I got my acts together with the determination to learn Azure container apps. And what better ways to learn a technology than building something on top of it? Yes, that’s exactly what I aim to do, but I decided to document the learning experiences, to help my future self and might be others who will be on the same boat.

Objectives
This is what I aim to build, a distributed application (at least two services, one as front end and another as backend) that uses the basic Dapr features. I came up with the idea to build an app that will do image recognition and offer the result via a web frontend. This also lets me explore some computer vision features, while I am at it. However, the feature of usability of this app is not my focus, I rather want to practice the following:
- Designing the application with the DevOps in mind, so everything will be in Infrastructure as code, Bicep to be more specific.
- I will be stretching the limits to keep the application secret free, so Managed Identity will dominate wherever possible.
- Explore some basic Dapr scenarios, like service-to-service invocations, pub-sub, observability etc.
- Exercise the Blue/Green deployment and traffic splitting capabilities of Azure Container service.
- When I accomplished the above, the next phase will be to use network isolations for the application, that is putting everything in virtual network, use private endpoints etc.
With that let’s start the journey.
Creating infrastructure
I started with the basic infrastructure elements that would be needed. I will be using Bicep and leverage the modularization capabilities to keep my infrastructure-as-code simple and readable. The folder structure will look something like the following:
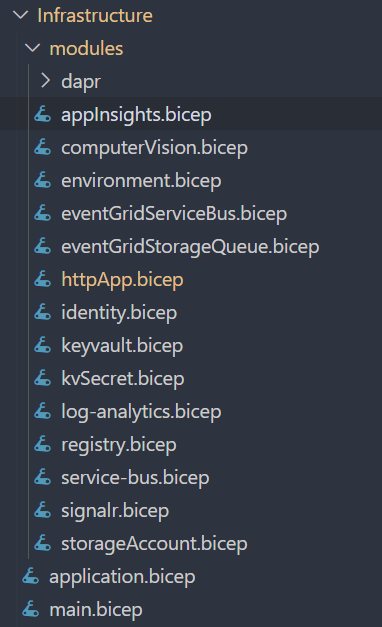
Individual components have their own module and then finally I am stitching them all together in my main.bicep file. For example, here is my application insights module looks like:
@description('Application Insights name')
param appInsightName string
param laWorkspaceId string
param location string = resourceGroup().location

resource appInsights 'Microsoft.Insights/components@2020-02-02' = {
  name: appInsightName
  location: location
  kind: 'web'
  properties: {
    Application_Type: 'web'
    WorkspaceResourceId: laWorkspaceId
  }
}
Similarly, key vault looks like below:
resource kv 'Microsoft.KeyVault/vaults@2021-11-01-preview' = {
  name: keyVaultName
  location: location
  properties: {
    enabledForDeployment: enabledForDeployment
    enabledForDiskEncryption: enabledForDiskEncryption
    enabledForTemplateDeployment: enabledForTemplateDeployment
    tenantId: tenantId
    accessPolicies: [
      {
        objectId: objectId
        tenantId: tenantId
        permissions: {
          keys: keysPermissions
          secrets: secretsPermissions
        }
      }
    ]
    sku: {
      name: skuName
      family: 'A'
    }
    networkAcls: {
      defaultAction: 'Allow'
      bypass: 'AzureServices'
    }
  }
}
One important lesson I learned, there are times when I wanted to publish a connection string or a secret from a bicep module as “output” and then in my main bicep file I would use that (like setting that as a configuration of a PaaS components or store it in key vault). But I noticed that Bicep extension for VS Code (which is a must install for any bicep developer) warns me not to expose any secrets as outputs from a module. Therefore, I took the strategy to pass the component that requires the secret into the module and let it configure within the module. Let me give an example to explain it better.
I have a computer vision resource (for image recognition) which has secret keys (Didn’t manage to make it work with managed identities yet). And I want to store the secret key to a key vault. Because I can’t expose the keys of computer vision as module-outputs, I decided to pass the key vault to computer vision module and create a secret when the computer vision resource is provisioned – all within the computer vision module. It looks like the following:
@description('Name of the Azure Computer vision')
param accountName string
param location string = resourceGroup().location
param keyVaultName string
param identityPrincipalId string
param accountEndpointKeyVaultKey string
param accountKyVaultKy string

resource keyVault 'Microsoft.KeyVault/vaults@2021-11-01-preview' existing = { name: keyVaultName }

resource computerVisionAccount 'Microsoft.CognitiveServices/accounts@2022-10-01' = {
  name: accountName
  location: location
  sku: {
    name: 'F0'
  }
  kind: 'ComputerVision'
  properties: {
    customSubDomainName: accountName
    networkAcls: {
      defaultAction: 'Allow'
      virtualNetworkRules: [ ]
      ipRules: []
    }
    publicNetworkAccess: 'Enabled'
  }
}

module computerVisionKey 'kvSecret.bicep' = {
  name: '${accountName}${accountKyVaultKy}-deploy-secrets'
  params: {
    keyVaultName: keyVault.name
    secretName: accountKyVaultKy
    secretValue: computerVisionAccount.listKeys().key1
  }
}

module computerVisionEndpoint 'kvSecret.bicep' = {
  name: '${accountName}${accountEndpointKeyVaultKey}-deploy-secrets'
  params: {
    keyVaultName: keyVault.name
    secretName: accountEndpointKeyVaultKey
    secretValue: computerVisionAccount.properties.endpoint
  }
}
Here we can see the last two block is actually storing the computer vision key and endpoints into the Key vault. Here’s how it’s used in main.bicep:
module keyvault 'modules/keyvault.bicep' = {
  name: keyvaultName
  params: {
    keyVaultName: keyvaultName
    objectId: uami.outputs.principalId
    enabledForDeployment: false
    enabledForDiskEncryption: false
    enabledForTemplateDeployment: false
    keysPermissions: [
      'get'
      'list'
    ]
    secretsPermissions: [
      'get'
      'list'
    ]
    location: location
    skuName: 'standard'
  }
}
module computerVision 'modules/computerVision.bicep' = {
  name: computerVisionAccountName
  params: {
    accountEndpointKeyVaultKey: KV_CVAccountEdnpointName
    accountKyVaultKy: KV_CVAccountKyName
    accountName: computerVisionAccountName
    identityPrincipalId: uami.outputs.principalId
    keyVaultName: keyvault.name
    location: location
  }
}
And of course, I have decided to create a user assigned managed identity that I will be using across the application to avoid handling secrets as much as I can. Here’s the module for that:
@description('Specifies the name of the user assigned managed identity.')
param uamiName string
param location string = resourceGroup().location

resource uami 'Microsoft.ManagedIdentity/userAssignedIdentities@2018-11-30' = {
  name: uamiName
  location: location
}
output principalId string = uami.properties.principalId
output tenantId string = uami.properties.tenantId
output clientId string = uami.properties.clientId
Creating the Azure Container Environment
Azure Container App starts with the concept of an Environment, where we will be deploying our containers. If you are coming from Kubernetes world (like me), I like to think of it as a namespace. In that analogy, Azure Container Apps is kind of a “Namespace-as-a-Service”.
Container Environment requires a Log Analytics workspace. Which says a lot that it embraces the observability from the get-go.
@description('The name of the log analytics workspace')
param logAnalyticsName string
param localtion string = resourceGroup().location

resource logAnalytics 'Microsoft.OperationalInsights/workspaces@2022-10-01' = {
  name: logAnalyticsName
  location: localtion
  properties: any({
    retentionInDays: 30
    features: {
      searchVersion: 1
    }
    sku: {
      name: 'PerGB2018'
    }
  })
}
output laWorkspaceId string = logAnalytics.id
With that I can now provision the Azure Container App Environment,
@description('Name of the Azure Container App environment')
param envrionmentName string
param location string = resourceGroup().location
param appInsightKey string
param laWorkspaceName string

resource logAnalytics 'Microsoft.OperationalInsights/workspaces@2022-10-01' existing = {
  name: laWorkspaceName
}

resource environment 'Microsoft.App/managedEnvironments@2022-03-01' = {
  name: envrionmentName
  location: location
  dependsOn: [
    logAnalytics
  ]
  properties: {
    daprAIInstrumentationKey: appInsightKey //appInsights.properties.InstrumentationKey

    appLogsConfiguration: {
      destination: 'log-analytics'
      logAnalyticsConfiguration: {
        customerId: logAnalytics.properties.customerId
        sharedKey: logAnalytics.listKeys().primarySharedKey
      }
    }
  }
}
To be continue
That’s all for today, in the next part, we will continue creating the containers and Dapr elements. The entire source code can be found in GitHub – if you want to take a look.
