Bridge to Kubernetes is a successor of Azure Dev Space. Distributed software’s are comprised of more than one services (often referred as micro-services), they depend on each other (one service invoking APIs of another service) to deliver capabilities to end users. While separations of services bring flexibility in delivering features (or bug fixes) faster, it adds complexity into the system as well as makes the developers workflow (inner loop) difficult. Imagine, a product has three services, backend (running a database for instance), an API service (middleware – that talks to the backend service) and frontend (that servers user interfaces to the end users and invokes API services). Running these services in a Kubernetes cluster means, three different deployments, corresponding services and possibly an ingress object. When we think the developer workflow for API service, we immediately see the complexity, as the developers of APIs now need to run a local version of the backend service and the frontend service to issue a request to debug or test their APIs. While the API developers might not fully aware how-to setup the backend service on their machine – as that’s built by a separate team. They now either must fake that service (with proxy/stubs) or learn all the details how to run backend service on their development workstation. This is cumbersome and still doesn’t guarantee that their API service will behave exactly as expected when they are running it in Test or production environment. Which leads to run an acceptance checks after deployment and increases lead time. This also makes it complicated to issue reproductions in local machine for troubleshooting purposes.
This is where Bridge to Kubernetes (previously Azure Dev Space) comes to rescue. Bridge to Kubernetes can connect development workstation to Kubernetes cluster, it eliminates the need to manually source, configure and compile external dependencies on development workstation. Environment variables, connection strings and volumes from the cluster are inherited and available to a microservice code running locally.
Setting up the environment
Let’s create a simple scenario – we will create 3 .net core API applications, namely, backend, API, and frontend. These apps do the minimum on purpose – to make really emphasize the specifics of the Bridge to Kubernetes (rather distracting with lot of convoluted feature codes). The backend looks like following:
app.UseEndpoints(endpoints =>
{
    endpoints.MapGet("/", async context =>
    {
        await context.Response.WriteAsync("Hello from Backend!");
    });
});
Basically, backend app exposes single route, and any request comes to that served with a greeting. Next, we will look at the API app (the middleware that consumes backend service):
app.UseEndpoints(endpoints =>
{
    endpoints.MapGet("/", async context =>
    {
        using var client = new System.Net.Http.HttpClient();
        var request = new System.Net.Http.HttpRequestMessage
        {
            RequestUri = new Uri("http://backend/")
        };
        var header = "kubernetes-route-as";
        if (context.Request.Headers.ContainsKey(header))
        {
            request.Headers.Add(header, context.Request.Headers[header] as IEnumerable<string>);
        }
        var response = await client.SendAsync(request);
        await context.Response.WriteAsync($"API bits {await response.Content.ReadAsStringAsync()}");

    });
});
Important to notice that we are checking for any headers with “kubernetes-route-as” key, when they are present, we are propagating that to the upstream invocations. This would be required later when we will see the Bridge to Kubernetes in action.
Lastly, we have our frontend service, invoking API service (as API did to backend):
app.UseEndpoints(endpoints =>
{
    endpoints.MapGet("/", async context =>
    {
        using var client = new System.Net.Http.HttpClient();
        var request = new System.Net.Http.HttpRequestMessage
        {
            RequestUri = new Uri("http://api/")
        };
        var header = "kubernetes-route-as";
        if (context.Request.Headers.ContainsKey(header))
        {
            request.Headers.Add(header, context.Request.Headers[header] as IEnumerable<string>);
        }
        await context.Response.WriteAsync($"Front End Bit --> {await response.Content.ReadAsStringAsync()}");

    });
}
Now we will build all these services and deploy them into the cluster (Azure Kubernetes Service). To keep the simple and easy to follow, we will deploy them using manifest files (as opposed to Helm charts).
The backend manifest looks following:
apiVersion: apps/v1
kind: Deployment
metadata:
  name: backend
  namespace: b2kapp
spec:
  replicas: 1
  selector:
    matchLabels:
      app: backend
  template:
    metadata:
      labels:
        app: backend
    spec:
      containers:
      - name: backend
        image: private-registry/backend:beta
        ports:
        - containerPort: 80
---
apiVersion: v1
kind: Service
metadata:
  name: backend
  namespace: b2kapp
spec:
  type: ClusterIP
  ports:
  - port: 80
  selector:
    app: backend
The manifest for API looks almost identical to above:
apiVersion: apps/v1
kind: Deployment
metadata:
  name: api
  namespace: b2kapp
spec:
  replicas: 1
  selector:
    matchLabels:
      app: api
  template:
    metadata:
      labels:
        app: api
    spec:
      containers:
      - name: api
        image: moimhossain/api:beta
        ports:
        - containerPort: 80
---
apiVersion: v1
kind: Service
metadata:
  name: api
  namespace: b2kapp
spec:
  type: ClusterIP
  ports:
  - port: 80
  selector:
    app: api
Finally, the manifest for frontend service:
apiVersion: apps/v1
kind: Deployment
metadata:
  name: frontend
  namespace: b2kapp
spec:
  replicas: 1
  selector:
    matchLabels:
      app: frontend
  template:
    metadata:
      labels:
        app: frontend
    spec:
      containers:
      - name: frontend
        image: moimhossain/frontend:beta1
        ports:
        - containerPort: 80
---
apiVersion: v1
kind: Service
metadata:
  name: frontend
  namespace: b2kapp
spec:
  type: ClusterIP
  ports:
  - port: 80
  selector:
    app: frontend
---
apiVersion: extensions/v1beta1
kind: Ingress
metadata:
  name: frontend-ingress
  namespace: b2kapp
  annotations:
    kubernetes.io/ingress.class: nginx
    nginx.ingress.kubernetes.io/ssl-redirect: "false"
    nginx.ingress.kubernetes.io/rewrite-target: /$1
spec:
  rules:
  - host: octo-lamp.nl
    http:
      paths:
      - backend:
          serviceName: frontend
          servicePort: 80
        path: /(.*)
You notice we added an ingress resource for the frontend only – and on a specific host name. I have used nginx ingress for the cluster and mapped the external IP of the ingress controller to an Azure DNS.
Applying all these manifests will deliver the application on http://octo-lamp.nl
Debugging scenario
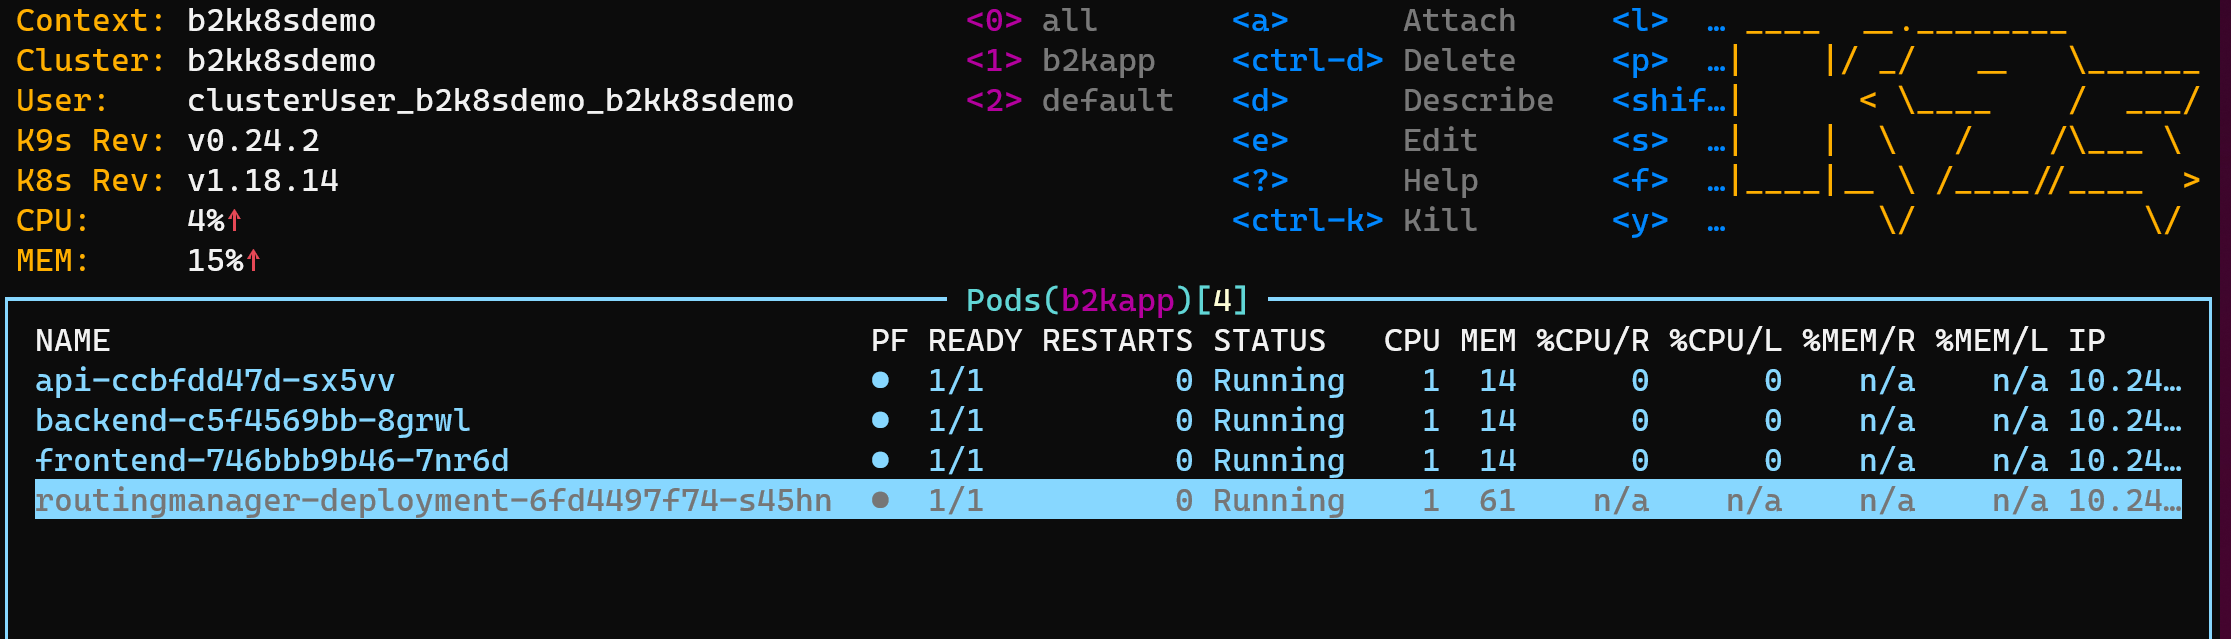
Now that we have the application running, let’s say we want to debug the middleware service – API. Bridge to Kubernetes is a hybrid solution, that requires installation on Kubernetes cluster and on our local machine. In the cluster, we will install only the routing manager component from Bridge to Kubernetes. Using the following command:
kubectl apply -n b2kapp -f https://raw.githubusercontent.com/microsoft/mindaro/master/routingmanager.yml
At this point, if we see the pods into the namespace b2kapp we should see the following pods:
To debug the api service locally, we would require installing the bridge to Kubernetes extension for Visual studio or VS Code (whichever you prefer to use)- I will be using visual studio in this case. Open the API project in Visual studio and you will notice there is a new launch profile – bridge to Kubernetes. Select that profile and hit F5. You will be asked to configure the bridge to Kubernetes:

We will select the correct namespace and service (in this case API) to debug. One important option here to select the routing isolation mode. If checked, B2K will offer a dynamic sub-route (with URL) that we can navigate to route traffic only coming via that sub-route specific URLs – this leave the regular traffic uninterrupted while we are debugging. once you press Ok, B2K will setup the cluster with few envoy proxies to route traffics to our local machine and hit any debug points that we have set.
The routing magic is done by two processes running in local machine in the background.
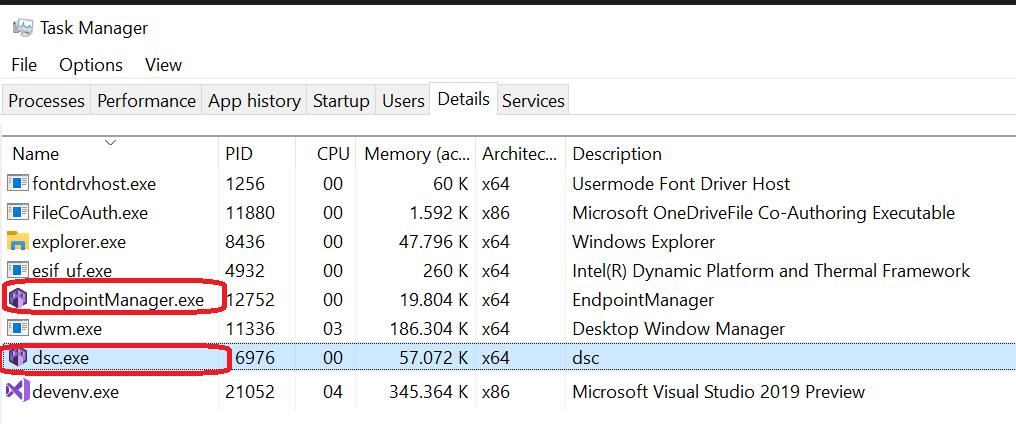
The DSC.exe is that process that dynamically allocate ports in local machine and use Kubernetes port forwarding to bind those ports to an agent running in Kubernetes – that is how the traffics are forwarded from the cloud to our local machine.

One thing to point out, that we are not building any docker images or running docker container during the debugging – it’s all happening on bare metal local machine (very typical way of debugging .net apps or node apps). This brings fast setup and a lightweight way to debug a service.
The other process is EndpointManager.exe – this is the process that requires elevated permissions because it modifies the hosts on local machine. Which in turn, allows API app to resolve a non-existent backend URI (http://backend) on local machine and manage to route that traffic back to the cluster where the service is running. If you open the C:\Windows\System32\drivers\etc\host file while running the debugger you will see these changes:
# Added by Bridge To Kubernetes
127.1.1.8 frontend frontend.b2kapp frontend.b2kapp.svc frontend.b2kapp.svc.cluster.local
127.1.1.7 backend backend.b2kapp backend.b2kapp.svc backend.b2kapp.svc.cluster.local
127.1.1.6 api api.b2kapp api.b2kapp.svc api.b2kapp.svc.cluster.local
# End of section
Running pull request workflow
One can also run a Pull Request workflow using the capability of Bridge to Kubernetes. that allows a team to deploy a feature that is in a feature branch (not yet merged to the release/master/main branch) and deploy that in Kubernetes using the isolation mode. That way, you can test a single service with new features (or bug fixes) by visiting it through the sub-domain URI and test the feature how that behaves in cluster. Of course, all the dependent services are real instances of service running into the cluster. This really can boost the confidence of releasing either a feature or bug fixes for any DevOps teams.
The way you do that, is to deploy a clone of the service (API service for this example) and PODs with some specific labels and annotations. Let’s say I have a manifest for API service – specifically written for PR flow, that would look like below:
apiVersion: apps/v1
kind: Deployment
metadata:
  name: api-PRBRANCENAME
  namespace:  b2kapp
spec:
  replicas: 1
  selector:
    matchLabels:
      app: api-PRBRANCENAME
  strategy:
    rollingUpdate:
      maxSurge: 1
      maxUnavailable: 1
  minReadySeconds: 5
  template:
    metadata:
      annotations:
        routing.visualstudio.io/route-on-header: kubernetes-route-as=PRBRANCENAME
      labels:
        app: api-PRBRANCENAME
        routing.visualstudio.io/route-from: api
    spec:
      nodeSelector:
        "beta.kubernetes.io/os": linux
      containers:
      - name: api
        image: DOCKER_REGISTRY_NAME/b2k8s-api:DOCKER_IMAGE_VERSION
        ports:
        - containerPort: 80
---
apiVersion: v1
kind: Service
metadata:
  name: api-PRBRANCENAME
  namespace: b2kapp
spec:
  type: ClusterIP
  ports:
  - port: 80
  selector:
    app: api-PRBRANCENAME
All I need to do in the Pipeline that builds the PR, is to come up with a branch name (typically branch names are provided in tools like Jenkins or Azure DevOps in environment variables) and replace the word PRBRANCENAME with the branch name. then simply apply the manifest to the same namespace. Once you do that, the routing manager does the following:
- Duplicates all ingresses (including load balancer ingresses) found in the namespace using the
PRBRANCENAMEfor the subdomain. - Creates an envoy pod for each service associated with duplicated ingresses with the
PRBRANCENAMEsubdomain. - Creates an additional envoy pod for the service you are working on in isolation. This allows requests with the subdomain to be routed to your development computer.
- Configures routing rules for each envoy pod to handle routing for services with the subdomain.
Therefore, if we now visit the PRBRANCENAME.octo-lamp.nl – we will see that requests are trafficked through the newly deploy API service (where the features are built) and the rest of the traffics remains unchanged. A great way to build release confidences.
Conclusion
That’s all for today. I seriously think it’s a neat approach to build confidence in any DevOps teams that runs services on Kubernetes.
Thanks for reading!
