Background
Sometimes, you want to send a message to a Microsoft Teams channel from an Azure Pipeline. It is trivial using the Microsoft Teams connectors – that gives you an endpoint to post the message. However, Office 365 Connectors (Including the Teams connectors) are retiring/retied. Therefore, if you want to publish a message to a channel from Azure Pipeline, you need to use Workflow app, Power Automate or Azure Logic apps that uses the new Teams connectors. Sometimes, it might feel overwhelming to setup a Power Automate or Logic app for this purpose.
Hence, I thought of creating an Azure Pipeline task, that you can run in a pipeline and it can post messages to Microsoft Teams channel via Graph API. You can use this extension from Marketplace and use it for free.
Graph Connector
This extension allows users to connect to Microsoft Graph and post messages to Microsoft Teams. The connector uses OAuth 2.0 to authenticate and authorize users to access Microsoft Graph.
Disclaimer: This extension is not an official extension from Microsoft. It is an open-source project developed by the author. The author is not responsible for any issues or damages caused by the use of this extension.

Prerequisites
In order to use this extension, you need to have a Microsoft Azure account and a Microsoft Teams account. You also need to have the following:
- A registered Azure AD application, with following configurations:
- Reply URL:
https://dev.azure.com/<Organization>/_admin/oauth2/callback. - Access tokens (used for implicit flows) and ID tokens (used for OpenID Connect flows) enabled.
- Required permissions:
ChannelMessage.Send,offline_access,openid,profile,User.Read. - Consent granted for the application.
- Generate a client secret for the application.
- Reply URL:


Configure OAuth connection in Azure DevOps
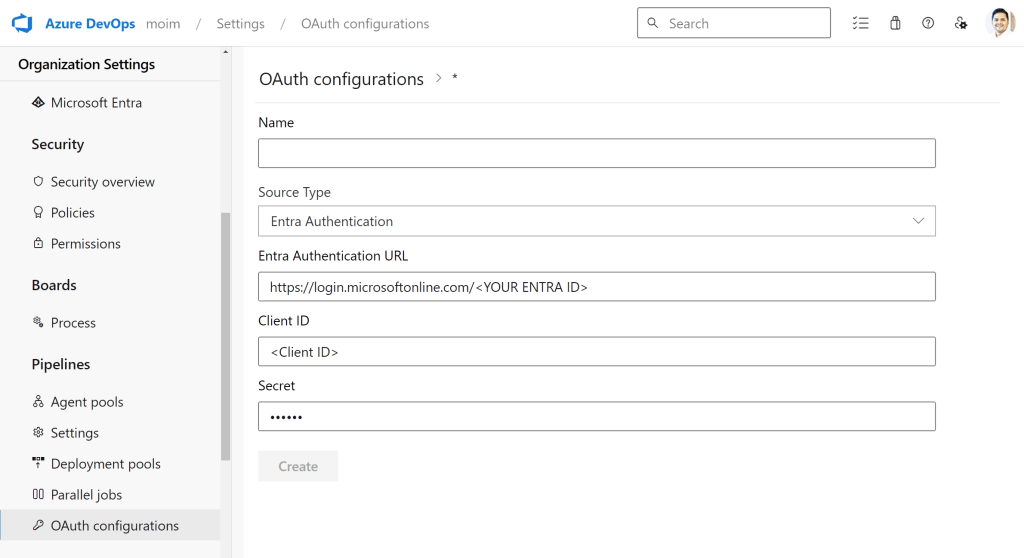
- Go to Azure DevOps Organization settings > OAuth Configurations.
- Create a new OAuth configuration with following details:
- Name: A name for the OAuth configuration.
- Source Type:
Entra Authentication. - Authorization URL:
https://login.microsoftonline.com/<Entra Tenant GUID>. Replace<Entra Tenant GUID>with the GUID of the Azure AD tenant. Don’t add/oauth2/authorizeat the end. - Client ID: The Application ID of the registered Azure AD application.
- Client Secret: The client secret generated for the application.
Create Service Connection
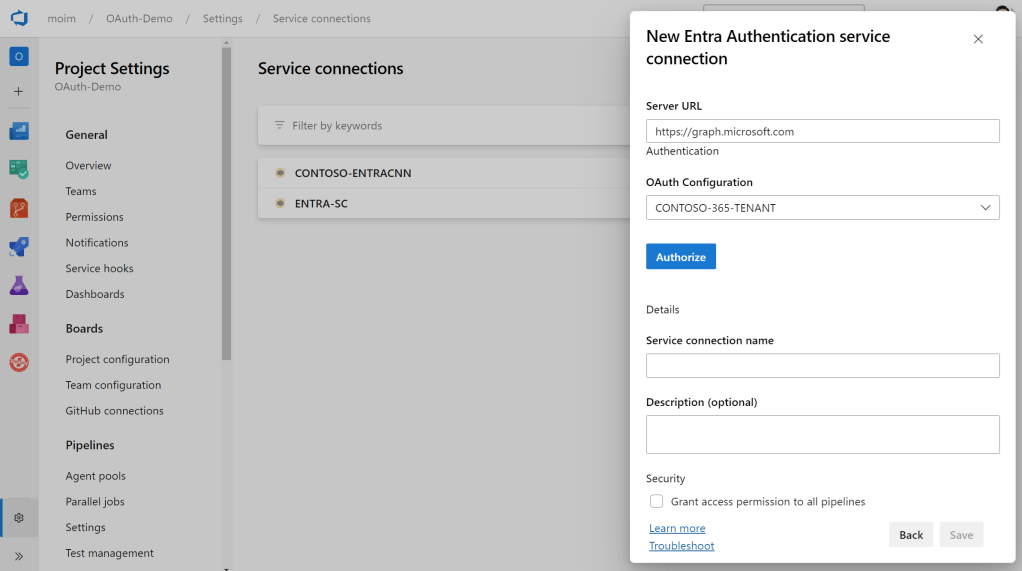
- Go to Azure DevOps Project settings > Service connections.
- Create a new service connection with following details:
- Service connection type:
Entra Authentication. - Service connection name: A name for the service connection.
- OAuth configuration: The OAuth configuration created in the previous step.
- Press
Authorizeto authorize the service connection. It will open a new window to authenticate and authorize the application. You can sign in with your Microsoft Teams account.
- Service connection type:

Select the Entra Authentication type from the choice, then authorize it, It will pop-up a window and prompt for Sign-In. You can sign-in using your Entra account (the account that you also use in MS Teams). Once the sign-in completes, give it a name and save the connection.
Usage
You can use the connector to post messages to Microsoft Teams from an Azure Pipeline. Here is an example of how to use the connector in a pipeline:
trigger:
- main

pool:
  vmImage: ubuntu-latest

steps:
- task: SendMessageToTeamsChannel@1.0.0
  inputs:
    EntraConnection: '<Service Connection Name>'
    teamId: '00000000-0000-0000-0000-000000000000'
    channelId: 'xxx.tacv2'
    payloadType: plaintext
    messageText: |
      Hello world,
      A quick brown fox
      jumped over the lazy dog
Run the pipeline and you will see the message posted to the specified channel in Microsoft Teams.

If you want to send a rich message, you can use the `payloadType: json` and provide a JSON payload in the `messageText` input.
You can create a payload JSON file either in repository or create in a previous step and use it in the task.
For example, if we have a payload JSON file `card-message.json` in the repository:
{
    "subject": null,
    "body": {
        "contentType": "html",
        "content": "<attachment id=\"74d20c7f34aa4a7fb74e2b30004247c5\"></attachment>"
    },
    "attachments": [
        {
            "id": "74d20c7f34aa4a7fb74e2b30004247c5",
            "contentType": "application/vnd.microsoft.card.thumbnail",
            "contentUrl": null,
            "content": "{\r\n  \"title\": \"This is an example of posting a card\",\r\n  \"subtitle\": \"<h3>This is the subtitle</h3>\",\r\n  \"text\": \"Here is some body text. <br>\\r\\nAnd a <a href=\\\"http://microsoft.com/\\\">hyperlink</a>. <br>\\r\\nAnd below that is some buttons:\",\r\n  \"buttons\": [\r\n    {\r\n      \"type\": \"messageBack\",\r\n      \"title\": \"Login to FakeBot\",\r\n      \"text\": \"login\",\r\n      \"displayText\": \"login\",\r\n      \"value\": \"login\"\r\n    }\r\n  ]\r\n}",
            "name": null,
            "thumbnailUrl": null
        }
    ]
}
Then you can use the following pipeline:
trigger:
- main

pool:
  vmImage: ubuntu-latest

steps:
- task: SendMessageToTeamsChannel@1.0.0
  inputs:
    EntraConnection: '<Service Connection Name>'
    teamId: '00000000-0000-0000-0000-000000000000'
    channelId: 'xxx.tacv2'
    payloadType: json
    payloadFilePath: './card-message.json' # Path to the JSON payload file
This will post a rich message to the specified channel in Microsoft Teams.

You can learn all the rich-payload body that you can use from Microsoft Graph Documentation.
Conclusion
I have built this extension to demonstrate how OAuth 2.0 authorization code flow can be used in Azure DevOps by means of Custom service connection, and custom taks and connect to an external service API – in this case Microsoft Graph. You can use it if this helps your use-case. If you run into issues, please let me know commenting below.
Thanks for reading! Till next time.
